My Thought Process
I hated the dingy, dated fake leather valances in my RV. I replaced all of the standard beige RV furniture with modern, bright furniture and now the valances looked even worse than before. I have seen other people buy fabric or different colored fake leather material and recover the valances. I have also seen people remove the valances altogether and add a curtain rod and curtains. These are all great ideas, but I don't mind the valance- I just hated the colors. I also thought there must be a cheaper way to improve their appearance. I don't want to have to dust curtains or take them down to wash them seasonally, so I decided to try painting the valances. If the experiment turned out to be a disaster, I could always recover them. So, I gave it a try...
All About Tidy may earn a commission through these independently curated links, at no expense to you.
Step One- Removal & Prep
The first thing I did was remove each valance. Each valance had two small screws holding it to a bracket. I used a screwdriver with a long shaft so that I could easily reach up inside the valance and unscrew them from the brackets. I quickly realized that my darkening shades were attached to the valance. They have a clip holding them in and I could have disconnected them, but I decided to keep them attached so I wouldn't risk breaking them.
I set up some saw horses with a sheet of plywood over it and laid out the valances. I have eight total valances in varying lengths. Next, I wiped the valances down with a soft rag with a bit of dish soap. I was careful to remove dust, dirt, and anything that could prevent the paint from sticking or looking smooth.

Step Two- Prime
My first step was to prime the valances with Kilz spray primer. I applied three fairly light coats and allowed them to dry for about 10 minutes in between coats.
Primer helps to cover any blemishes and prepares the surface for paint. This was especially necessary for these valances because I don't think that this fake leather stuff is meant to be painted.
I must admit- even with the uneven primer, I liked the look of the valances better already.

Step Three- Allover Paint
I opted for Krylon Fusion Paint & Primer spray paint in satin white. It claims to work on most surfaces, so I thought it was worth a try. My plan was to spray the valances completely white and then go back and mask the white so that I could paint the detail area a light gray color.
It was at this point that I remembered that the darkening shades were attached to the valance, and I hadn't covered them when I sprayed the primer. CRAP! I used a large trash bag to cover the gap in the valance so that the shades would be protected.
The spray paint seemed to cover nicely even after the first coat. In the end, I sprayed three coats and was happy with how even the coverage looked. The bright white with a light sheen was exactly the look I wanted.

Step Four- Masking
In a perfect world, I would use painter's plastic, but I forgot to buy that, so I used big trash bags. I cut the end off of the trash bag and slid the valance through it so that it covered the middle section between the two accent pieces. Then I used small, dog poop bags for either end. I know...but, it was all I had.
I used painter's tape to secure it to the accent piece so there would be sharp lines. I used Rustoleum Protective Enamel in a Smoke Gray. I also sprayed three coats of this paint and with every coat it looked better and better.

Step Five- The Reveal
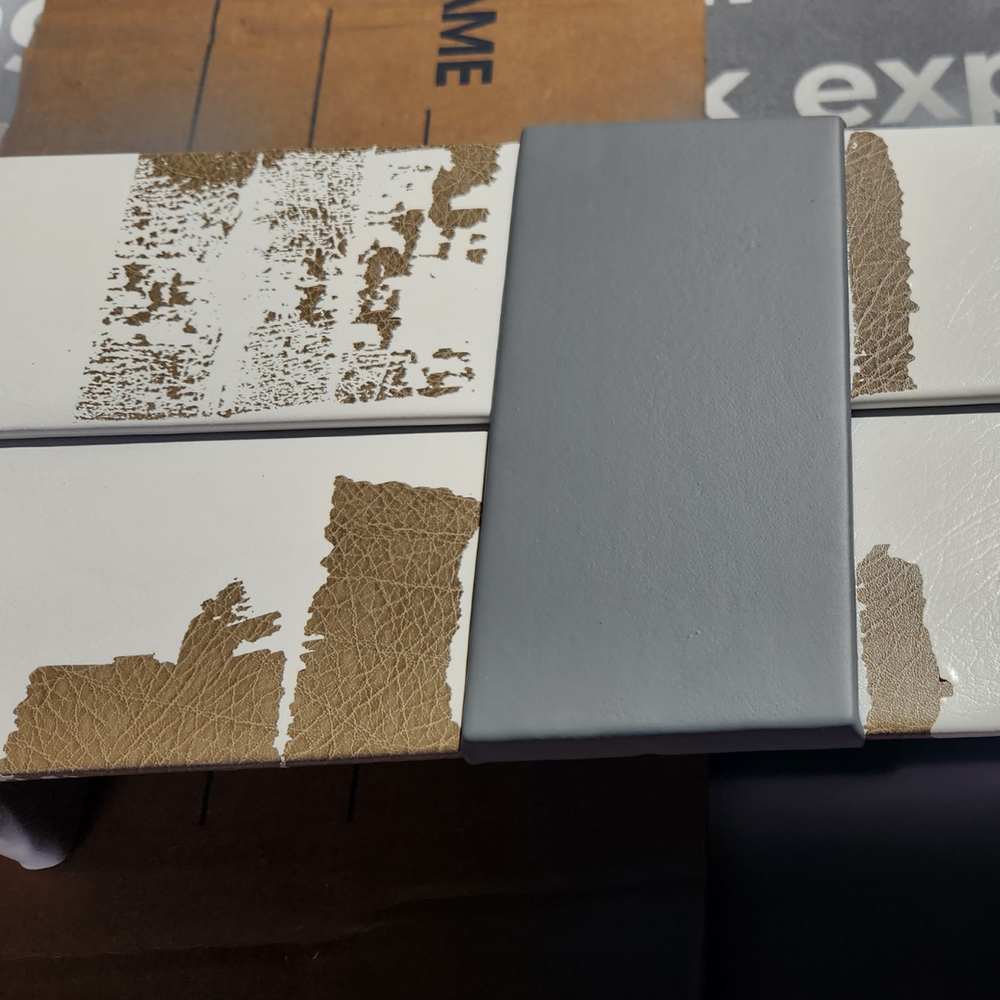
Spoiler Alert- The reveal was a complete failure.
I was so excited to remove the tape and masking plastic to see how my masterpiece turned out. But, alas, it was a disaster.
I slowly and carefully peeled away the painter's tape, and all of the paint and primer peeled away with it to reveal my nemesis- that ugly beige color. I nearly gave up- but I had a vision of how great these valances could look, so I switched gears and came up with a new plan.
I reprimed and resprayed the areas where the tape peeled the paint. I didn't worry about spraying over the gray, I just focused on fixing the white areas.
Step Six- Handpaint the Accents
If you decide to paint your RV valances, you will be done already because you will have learned from my mistake. At this point, the white areas were fixed and looking great again. Now I had to address the gray accent areas. My husband was frustrated and repeatedly told me that he likes them being all white. They did look good but I had my heart set on gray accents.
I decided to buy some interior paint and handpaint them. I bought a quart of Valspar Reserve paint with primer in a light gray color and started painting. I handpainted three coats of gray.

Step Seven- Reveal Part Two
This time, they turned out great. I still had to deal with the overspray issue on the darkening shades so I used some paint thinner and removed the paint from the shades. The paint came off, thankfully.
After they had completely dried, I wiped them down with a damp cloth and reinstalled them. I absolutely love the finished result. They brighten the RV so much and complement the furniture so much better.
In the end, I spent about $180, but if I had handpainted the accents from the beginning, I would have only spent $130. If you are not happy with the look of your RV valances, I recommend painting them.


